For Authorization we are using the WSO2 Identity server and Inbuilt Entitlement mediator in WSO2 ESB.

You can see the high level view of the ESB and IS communication. Let me explain the scenario.
1. User going to access the proxy service with the user credentials.
2. ESB authenticate the user first
3. If the authentication pass then go to Identity Server through the Entitlement Mediator and call the get decision method with above credentials
4. Identity Server will look the XACML policies and return the decision.
5. If decision is "Permit" then proxy service allow to access the echo service
6. If decision is "Deny" or "Not applicable" proxy service not allow to access the echo service.
Lets look at the configuration of this setup. We are using ESB-4.6.0 and IS-4.1.0
1. You have to share the same User store with WSO2ESB and WSO2IS
refer the ESB user-mgt.xml and IS user-mgt.xml - this is done for Embedded LDAP coming with WSO2IS but you can configure any DB as your user store and share with both ESB and IS
2. Start the IS first and then ESB with port offset 1
3. Create "In sequence" in ESB
here you need to add the entitlement mediator as a first child of In Sequence

Select the entitlement and set the entitlement server url, username and password.
entitlement server url = https://localhost:9443/services/
username = admin
password = admin

Set the Fault mediators under OnReject as well as set the Send mediator under OnAccept
Set the Header mediator as follows and remove the security headers.

Click on the Namespaces and put the following entry.
Prefix - wsse
URI - http://docs.oasis-open.org/wss/2004/01/oasis-200401-wss-wssecurity-secext-1.0.xsd

3. Create "Out sequence" in ESB
just put send and log mediators as follows

4. Now we need create the proxy service for echo service already in WSO2ESB
Add new proxy -> custom proxy then you can see the following window and you have to specify the following details.
Name - EchoProxy
Publishing WSDL - Specify source URI
then put the wsdl of the echo service as "http://localhost:8281/services/echo?wsdl"

Move next and select the "InSequence" that we created before.
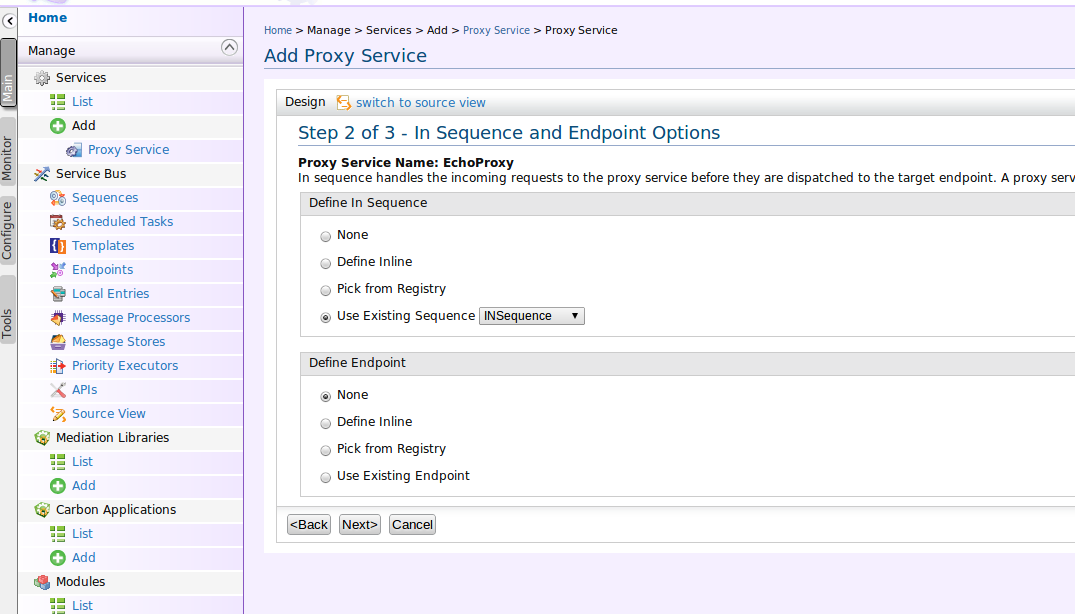
Move next again and select the "OutSequence" as well.

finally click the finish
Now you have to create the new role "testRole" with admin permission and new user "testuser" with password "testuser" and assign the "testRole" because we are using this to control the access . then secure the created proxy with Username Token as follows


Now you complete the proxy service creation and lets move to Identity server configurations.
5. In Identity server we need to add the XACML Policy
Here I'm going to create the simple User base XACML policy.
Name - EchoServicePolicy
Specify the Role name as "testRole" as well as you have to specify the action as "read" because our Entitlement mediator send the action string as "read"

Finish the policy and enable the policy to test.

Now you can evaluate the policy through the Tryit.

But if you click on the "Evaluate with PDP" you will not get Premit because still you not promote the XACML policy to the PDP.
to promote XACML policy to the PDP you can click on the button in front of the policy "sync with PDP". Now try to "Evaluate with PDP".
Now we done the configuration on Identity Server.
6. Go to ESB and select the EchoProxy service and go to TryIt.

Here we are using "testuser" which is under the role "testRole" so the XACML engine will permit to access the resource

Now go and remove the "testRole" form user "testuser" and try to access the service. Now you can see XACML engine is not permit to user to access the resource.


